This is a tutorial on installing WordPress from scratch on a Google Compute Engine Instance. I chose to use WordOps to install and configure my LEMP stack for simplicity. WordOps is based on EasyEngine and makes the installation of all of the required components hassle free.
There are other solutions and options for doing this, but if you want a fast and flexible setup, you should consider these options. Once installed, you can continue to use WordOps to manage your LEMP stack and deploy WordPress sites, or you could even do that manually. In the demonstration and procedures, I will deploy just one basic WordPress site. It is simple to deploy others if you need to host several websites on the same instance.
In other articles and videos, I’ll show how to install SSL for the websites and setup a backup system for all of your websites.
Let’s get started!
Setup Google Compute Engine Instance
If you are new to Google Cloud, you will need to setup your account. The good news is that you can get $300 in credit from Google to use on Google Cloud services.
Once you have your account setup, you will then need to create a Project. The idea of organizing in a Project is that you can have all of the resources you need for your Project in one container. This can help if you need to grant access to other users or need to manage a budget for multiple projects.
To create an Instance, you will need to decide on several options depending on your specific needs. The options you select with affect your monthly costs. If you don’t choose a powerful enough setup, the good news is that it is easy to upgrade later. In fact, as your instance runs, Google will make recommendations for upgrades if it sees high CPU or memory utilization.
For the demonstration, I chose a Small E2 setup. This is more than adequate to run a website for business without a huge amount of traffic. In other articles, I can show you how to use caching and a Content Delivery Network to reduce the load on your server.
For the operating system, I chose Ubuntu 18.04 LTS (Long Term Support). Version 20.04 just came out, but it is not yet supported in WordOps.
Prerequisites for Google Cloud
Of course, you’ll need to signup for FREE Google Cloud Account (If you are opening a new account you may get free $300 credit for 1 year). During setup you will be prompted to setup billing for your account. You will also need to setup your project using the Project console.
Create Compute Engine VM Instance
- Navigate to the Compute Engine > VM Instances in the Google Cloud Console.
- Now create a VM Instance with the following details
- Name: Your desired name (vps1 for example)
- Region: Closest to your audience (If your traffic is mostly in one area, pick the closest region)
- Zone: Your choice (Doesn’t matter for a single server. But if you have other Google Cloud resources, you might want to pick the same zone or different zone depending on your requirements for speedy transfers or redundancy)
- Machine Type: E2 – Small
- Boot Disk: Ubuntu 18.04 LTS
- Identity and API access: Allow full access to all Cloud APIs
- Firewall: Check Allow HTTP traffic & Allow HTTPS traffic
- Click Create.

Reserve your IP Address
Your Compute Engine Instance will be take a few minutes to be created. Each VM instance has an internal and external IP address. By default, it will start with an external IP address that will change each time you restart your instance. The first thing you should do is shutdown your instance and reserve an external static IP for it. To reserve your external IP address as static, go to VPC Network -> External IP addresses and reserve the IP address. You’ll have to name the IP (like vps1-ip) and then assign it to your instance.
If you have registered a domain name, this External IP should be what you enter for the A Name of your domain. If your domain is currently in use with an active site, you may want to hold off until you have completely prepared the new website.
Configure the Firewall
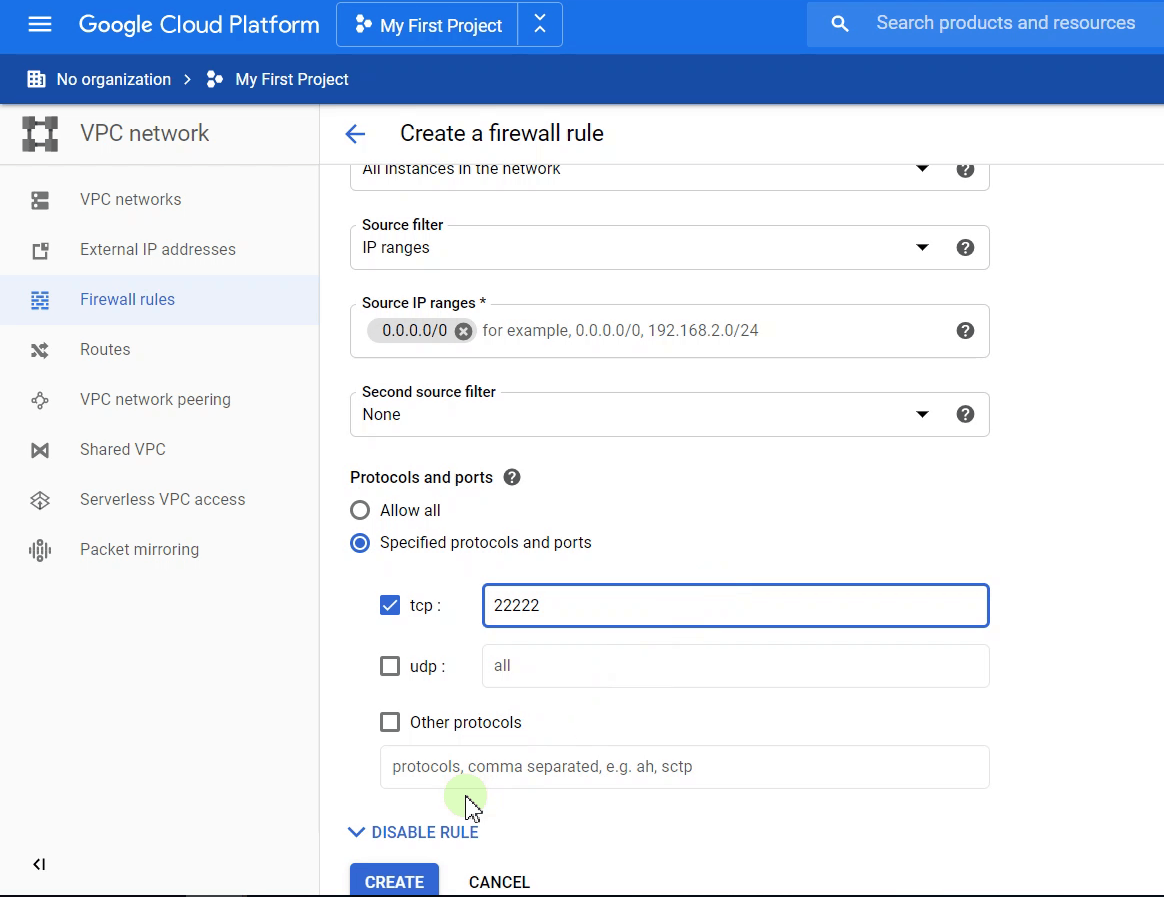
When you setup your instance, if you checked HTTP and HTTPS, the firewall will be configured to allow traffic to those ports. If you want access to the WordOps Dashboard that will be installed, you should add port 22222 to the firewall rules.
You’ll need to navigate to VPC Network -> Firewall Rules.
- Give the rule a name (wordops)
- Targets – select all instances in the project
- Source filter – IP Ranges, then enter 0.0.0.0/0 for source IP ranges
- Specified protocols and ports – Check TCP and enter 22222
- Click Create
Setup WordOps
In the past, I have tried building my own LAMP or LEMP stack, using the Google Cloud “Click to Deploy” scripts, etc. These easy have trade offs in ease of use or flexibility. For my latest installs, I utilized WordOps. It is a tool that you can run on a fresh install of Ubuntu that will download and configure Nginx, PHP, MariaDB, and Redis cache. It will also assist in the deployment and management of WordPress sites. WordOps is a fork of EasyEngine which has elected to use Docker in the latest versions.
Before we get started, it is best to make sure your Ubuntu install is up to date:
apt-get update
apt-get upgrade
Once you have updates you system, run this command to download and install the basic WordOps framework.
wget -qO wo wops.cc && sudo bash wo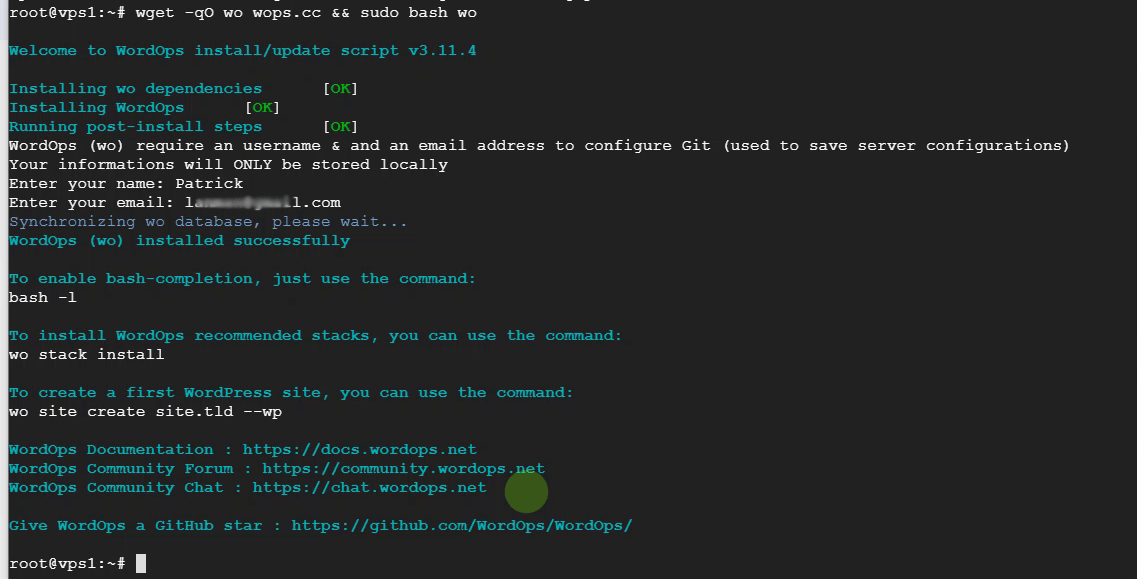
Next, install the full LEMP stack:
wo stack install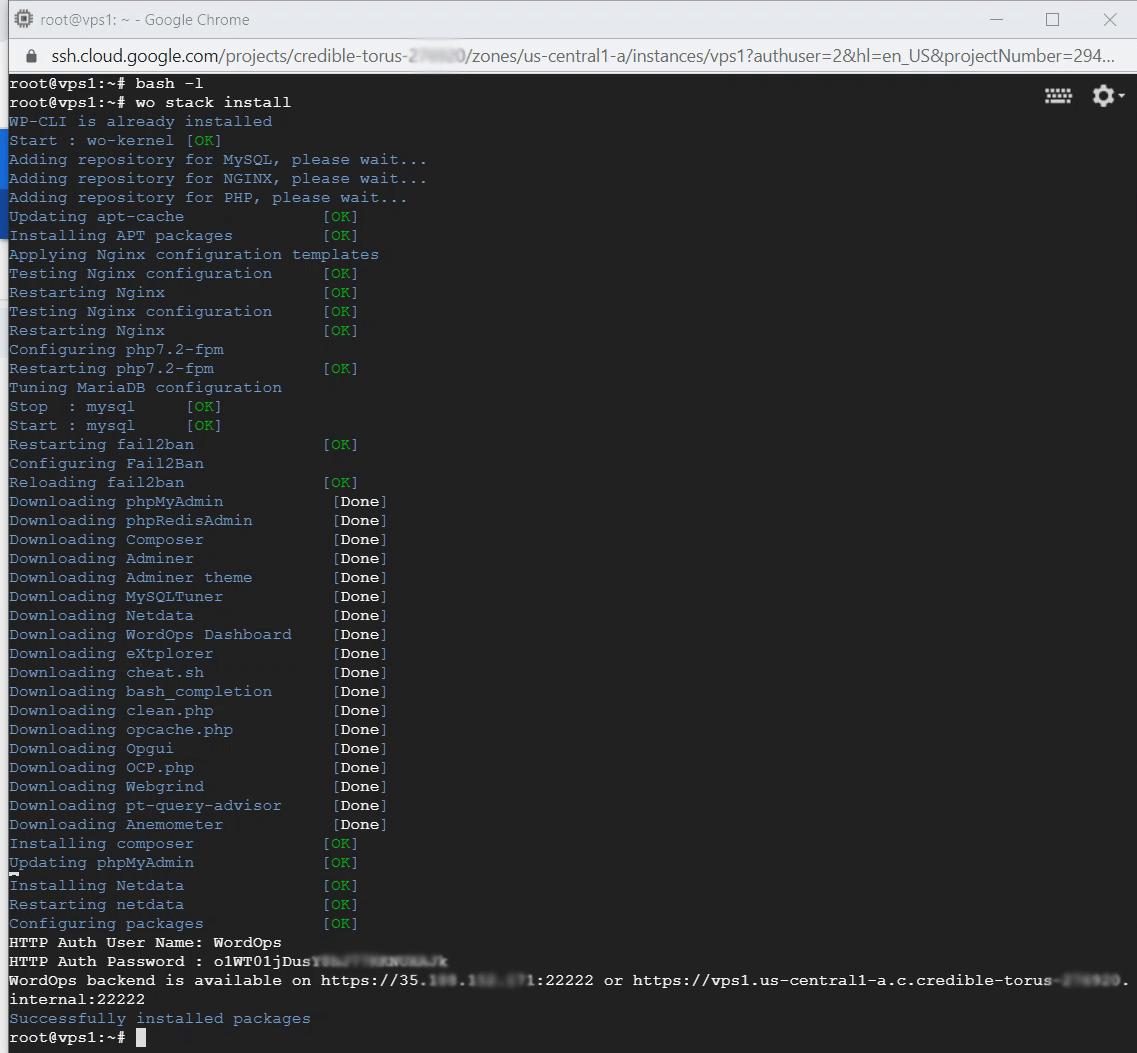
Install first WordPress site
For my actual WordPress install, I entered the following command:
wo site create urdomain.com --wpredis --php73 
This will setup a basic WordPress site using Redis cache and PHP 7.3. Redis cache was chosen simply because it is a fast caching system with minimal setup. In addition to configuring Redis cache, this also installs a couple of plugins in WordPress to help with the cache management – Nginx Helper and Redis Cache. I also picked PHP 7.3. You can also use PHP 7.4, but I have not tested all of my themes and plugins to make sure they are compatible. I’ll save PHP 7.4 for a later upgrade.
You should be able to access your website using the IP address of your instance. If you have configured a DNS entry with your domain host, you can use the domain name.
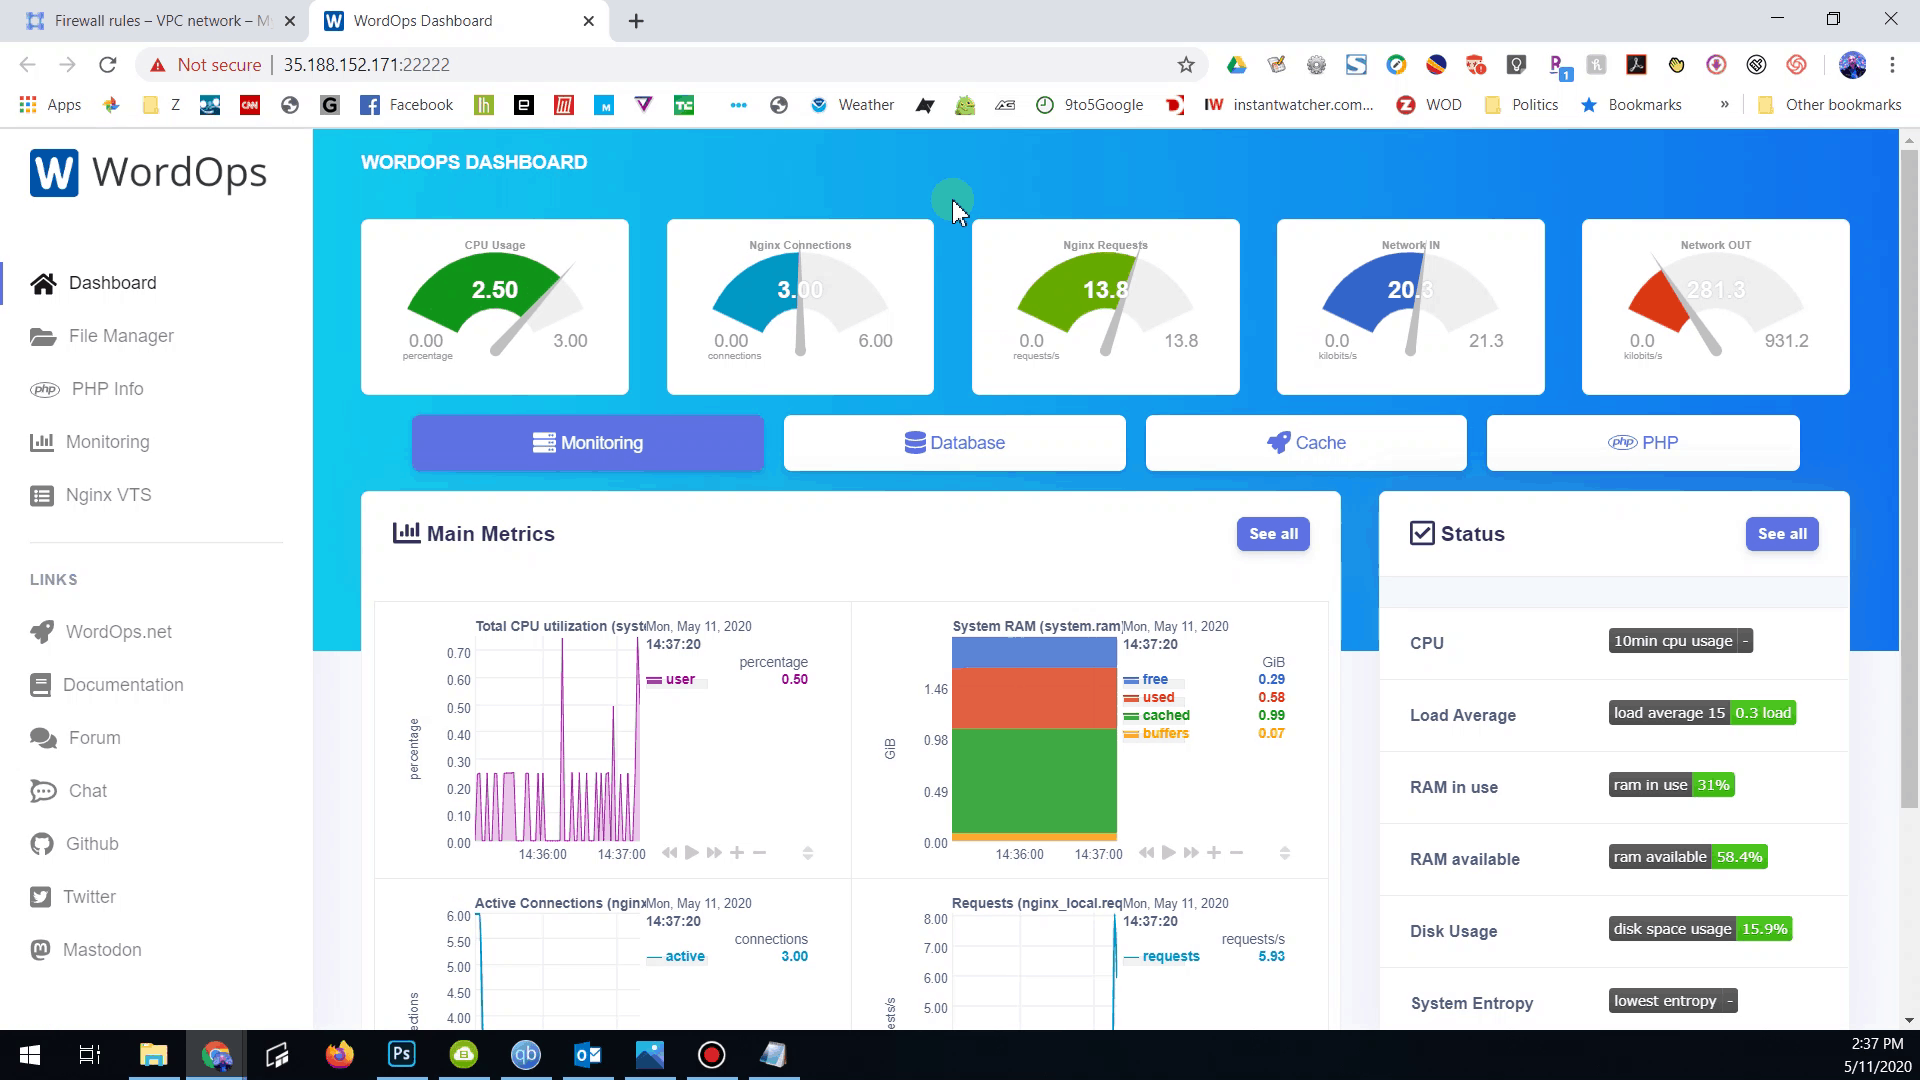
You can also access the WordOps Dashboard using the credentials given by the install script.
Next Steps
For the next steps, you should change the login name and password on your setup. It is easy to do by entering:
wo secure --authThe Google Cloud Firewall can provide adequate firewall protection. If you want to add a firewall directly to the server it is also easy to do with this command:
wo stack install --ufwNOTE: You will then need to make sure the correct ports are open. At a minimum, you’ll need ports 80 (web), 443 (SSL web), 22 (SSH), and 22222 (WordOps console) open.
ufw allow 22
ufw allow http
ufw allow https
ufw allow 22222
ufw reload
Summary
That’s it for getting your own setup of WordOps and WordPress running on Google Cloud. I will continue this series with some other useful instructions on how to add SSL support, backups, maintaining multiple installs of WordPress, and more. If you have any comments or suggestion, shoot me an email at [email protected].